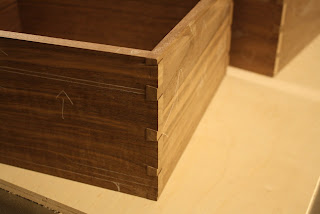
Gallery

Showing posts with label dovetails. Show all posts

19 June 2011

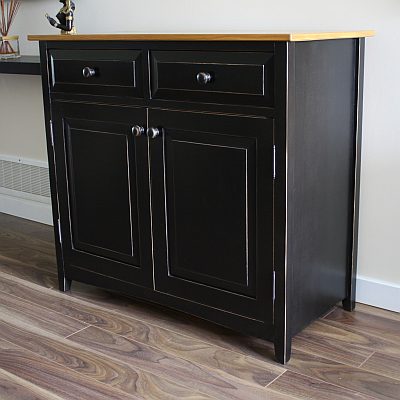
Chic country style cabinet

Hello,

I apologize for my gross neglect for the past few weeks! However, I am back now and I have a few photos to share with you of my newest project. The project is completed and hopefully happily sitting in my clients home. I do have reveal photos to share, but I would like to hear from you if you would like to see some in progress photos. So, if you do please let me know :)

So I present to you... the chic country style cabinet! Enjoy!

22 March 2011

Raven inlay Jewelry and Make-up Boxes-The Reveal

Hello,

Well, here it is! The finished inlay boxes. It was so much fun to construct. I'm hoping to do more marquetry in the near future.


The jewelry box.


The make up box.

Thanks for joining me!
Roshaan

12 March 2011

Raven inlay Jewelry and Make-up Boxes-Part 11

Hello,

This part is the continuation of the upper tray construction. I will be focusing on the glue up of the trays and the reinforcement of the mitered joints with splines. So please join me!


Before I cut the half-lap joints in part 10, I first cut tiny tenons on the ends of the dividers. I then put each divider in place to determine the location of each half-lap joint. The tenons are easily done on the table saw with the miter gauge and stop block.


Before I do any glue up, I do a dry run first to prevent any headaches while I'm in the process of gluing the piece. Now is a good time to work out any kinks in your gluing operation. With this glue-up I determined that I first need to put the divider assemblies in one corner of the tray and then put the bottom panel in place at the same time. Then it's simply a matter of wrapping the other corner parts around the dividers and bottom panel. Of course before I did any of this I made sure to place some clear packing tape on all the mitered joints.


I use a band clamp to snugly bring everything together. This is a great clamp for a mitered box construction.


Here I am using my nifty (do people still say that?) table saw spline sled to cut the slots for the hardwood splines.


I glue the walnut splines in place, but before I do that I check the fit of each one. After the glue dries, I use a flush trim saw to cut off the waste. I then sand everything flush.


We are almost to the finish line! So please come back for the last few parts.

Thanks for looking!

Roshaan


Raven inlay Jewelry and Make-up Boxes-Part 10

Hello,

It's all about making the top trays in the next two parts. I will be cutting stopped grooves on my little Dremel router table and half-lap joints on the table saw. So, here we go!


I love my Dremel tool! It is so versatile and can do pretty much everything bigger machinery can do, but on a much smaller scale. It is perfect for model makers, home owners and for woodworkers like me. Here I have attached my Dremel tool to a router table attachment to cut the 1/8" wide stopped grooves, which will join the cross members of the tray dividers.


Here are all the tray sides layed out to better visualize how the tray and dividers will come together. This tray is meant for the jewelry box and it will have 9 equal sections for rings and things.


Here I am cutting the half lap joints on all the dividers. It is best done on the table saw with a single saw blade instead of a stacked dado set. This method will yield greater accuracy when fitting parts together.


A half-lap is basically two notches going halfway through the corresponding parts and in opposite directions.


I glue up the dividers first before I glue them to the stopped grooves in the tray sides. Now is the perfect opportunity to clean up any glue squeeze-out.
That's it for now! Please come back soon for the continuation of the tray construction.
Thanks for looking!
Roshaan


Raven inlay Jewelry and Make-up Boxes-Part 9

Hi Everyone,


It's hardware time! This is a true sign that we are getting very close to the finish line. In this part I will be installing the hinges, the chains etc. and I will also start construction of the upper trays.


I usually cut the shallow mortises for the hinges using a hand held router and then square the lines with a sharp chisel. This time I'm trying something new. I'm using a router table with stop blocks on either side of the router bit, to control the length of the cut, which precisely fits the hinge leaves.


Notice that the router bit leaves a round corner? I simply use a chisel to square the corners to fit the hinge better.


I also went ahead and installed the chain to keep the lid from flopping backward. Since the box will have an upper tray, I also attached some wooden risers on the interior of the box. Notice the rabbet cut on the riser on the chain side of the box? This rabbet will act as a stop, which will prevent the tray from sliding side to side and hitting the chain.


The trays will have simple mitered corners with splines for reinforcement. At the table saw with the blade tilted at 45 degrees to cut the miters.


A closeup of the grooves I cut to house the bottom panel of the tray.

Please join me next time for part 10 when I will be constructing the dividers of the trays.

Thanks for looking!

Roshaan


Raven inlay Jewelry and Make-up Boxes-Part 8

Hello Everyone!

The boxes are really taking shape now. I will continue with the glue-up and separate the lid from the bottom in this part.

As soon as each corner is glued and any waste cleaned up, I can insert the top inlaid panel and the bottom panel in the grooves.

Now all I have to do is spread some glue on the remaining corner joints and bring the two halves together. Notice how I have the glue blocks already taped in place so I'm not scrambling around later to find some. Organization is truly important in any glue-up


The box snugly in clamps and just waiting for a cure :)

After the glue has dried and the sides cleaned up, I cut the lid apart from the body of the box. I make sure not to cut all the way through to prevent the parts from binding and causing a safety hazard. I just leave a sliver of wood between the lid and the body and use a hand saw to complete the separation.


At the bench using a sanding base to flatten the top edges of the box and lid.
Well that's all for now folks! Please stay tuned for part 9!
Thanks for looking!
Roshaan


Raven inlay Jewelry and Make-up Boxes-Part 7

Hi All,

Well, I am quite pleased with how my first attempt at marquetry turned out. I think I will be doing quite a few more in the future :)


After I successfully completed the raven inlay, I cut a substrate made out of a good quality Baltic birch plywood. I like to use this material for a substrate, because it is very flat, without prominent grain (which could potentially telescope through the thin veneer) and very stable. I elevate the whole assembly by using shop-made t-stands underneath. These come in very handy for panel glue-ups or any glue-up for that matter. The elevation just allows for easier clamping.


After the veneered panel has cured, I use a sharp utility knife to trim the excess flush.


Now it is just a matter of cutting the panel to size using my shop-made crosscut sled on my table saw. This sled gives you very accurate results.


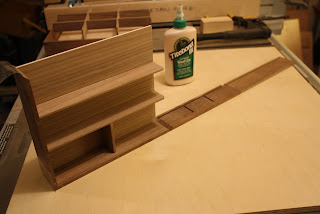
I'm sure everyone has seen me use this method of gluing difficult joinery. It is because there are many gluing surfaces to these dovetails and since the wood glue dries very quickly, it makes for a tricky glue-up when 4 corners are involved. Therefore, I prefer to glue the box in stages.

After each corner has cured, I use a block plane to trim the waste flush.
Please join me next time to see how the boxes come together!
We're almost there!
Thanks for looking!
Roshaan



22 February 2011

Raven inlay Jewelry and Make-up Boxes-Part 4

Hello,

Welcome back for part 4 of the duo of boxes! In this part I will be veneering the bottom piece of the make-up box and I will also cut some stopped grooves and through grooves on all box sides using only a single blade in the table saw.


Before I cut the grooves to house the bottom panel of the box, I first veneer the bottom panel to determine the width of the groove to ensure a nice snug fit. Here I use a fairly straight grained walnut veneer sheet to be glued to a baltic birch substrate. I use baltic birch because it is a high grade plywood product that is flat and stable. I wouldn't for instance use a highly figured piece of fir ply since the grain will telescope through the thin veneer sheet.
To ensure a full veneer to substrate contact I employ quite a few clamps, some thick cauls as well as beefy glue bases. I do prefer to use white glue because it has a thin glue line and it also offers a longer working time.


After the bottom piece is removed from the clamps, I simply use a sharp utility knife to cut away the excess veneer along all sides. I then measure the thickness of the piece to determine the width of the grooves to be cut on the table saw.
I make sure to cut stopped grooves on the tail boards and through grooves on the pin boards. Stopped grooves are essential to prevent unsightly holes on the outside of the box.


One negative aspect of stopped grooves is that you have to square the ends to ensure a perfect fit of the bottom panels. This is easily done with a few sharp chisels and wooden mallet.
Well that is it for part 4! Please join me next time when I will show you how to shape the bottom of the box sides to add some flair!
Thanks for looking!
Roshaan


21 February 2011

Raven inlay Jewelry and Make-up Boxes-Part 3

Hi Everyone!

In this part I will continue to cut out the dovetails. At the end of this part we will have great fitting dovetails that are not only great to look at, but also very strong.


I ended part 2 with cutting the pins with a dovetail saw, making sure to stay well away from the scribed layout lines. Now I continue to cut out the waste in between the pins by using a coping saw. I opt for a coping saw instead of my scroll saw because now I am dealing with angled sides.
After the waste has been removed I reach for my chisels to pare away the rest while using the scribed knife lines as guides. I also square the shoulders by using the same method as seen in part 2.

And voila! The finished dovetails on both boxes! These are perfect fitting dovetails. Although the paring method is time consuming it surely leaves you with exceptional results!

A close-up of the dovetails. Also notice how the grain of the walnut continues consistantly around all sides of the box.
In the next part I will be tackling some grooves and shaping the bottom of the box sides for a nice design detail.
Thanks for looking!
Roshaan

13 February 2011

Raven inlay Jewelry and Make-up Boxes-Part 2

Hi Everyone!

Welcome back to part two of the box duo! We ended the last part by carefully marking out the dovetails. Today we will be cutting those dovetails by a combination of the table saw and by hand using a hand saw especially made for cutting dovetails, appropriately named a dovetail saw. To clean up the dovetails we will be using various sized chisels and a wooden mallet.


I start by cutting the tails first. I use the table saw to quickly and accurately cut the angles of the tails. I simply tilt the blade to the appropriate angle of the dovetails, in this case I went with the 1 : 6 ratio to get that angle. The stop block is a great way to get accurate and repeatable cuts. Now from these cuts everything else will follow, so I take extra care to be very precise with this operation.

After all the tails are cut at the table saw I then look toward my scroll saw to remove the waste in between the tails. I make sure I stay far enough away from the the scribed line of the shoulders. This will be cleaned up later with the help of a guide block and chisel. Who says a scroll saw can't be used for fine joinery!
At my bench I clean up the shoulders of the tails. I use the aid of a beefy guide block to help guide the chisel at a perfect 90 degree angle as I chop out the waste.

After all the shoulders of the tails have been squared up, it was time to mark the pin board. I carefully line up the tail board on the end of the pin board. I steadily hold the pieces in place and with a very sharp marking knife, I carefully trace the angle of the tails onto the pin board.


Before I can cut the pins however, I make sure to scribe the thickness of the tail board onto the edge of the pin board by using a marking gauge. I also use a machinist square to carry the lines of the angles onto the face of the pin board. Then with my fantastic Veritas dovetail saw I cut the pins, staying well away from the marked lines.
Well that's it for now folks! Please join me next time to see how the dovetails turn out.
Thanks for looking!
Roshaan