Well, here it is! The finished inlay boxes. It was so much fun to construct. I'm hoping to do more marquetry in the near future.


The make up box.


After the finish has cured for a couple of days, it is now safe to handle without getting finger smudges on the fresh finish. I apply a rich brown felt to the bottom of the jewelry box and the upper tray. The make up box will simply have a nicely finished wooden interior. I also reattach all the brass hardware to finish everything off.
I really enjoyed this project and I hope you did too!
Please stay tuned for the reveal.
Thanks for looking!

After the glue dries I am now ready for the lock. This lock is known as a full mortise lock, since I have to cut a deep mortise for the locking mechanism to sit in. I made a simple drilling guide to help me locate the ends of the brass plate and the mechanism. The nice thing about this jig is that I can just line up the center line to the center of the base and the lid. This ensures that both brass plates line up perfectly.


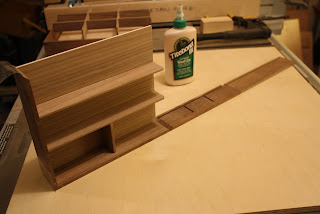
Before I cut the half-lap joints in part 10, I first cut tiny tenons on the ends of the dividers. I then put each divider in place to determine the location of each half-lap joint. The tenons are easily done on the table saw with the miter gauge and stop block.

Before I do any glue up, I do a dry run first to prevent any headaches while I'm in the process of gluing the piece. Now is a good time to work out any kinks in your gluing operation. With this glue-up I determined that I first need to put the divider assemblies in one corner of the tray and then put the bottom panel in place at the same time. Then it's simply a matter of wrapping the other corner parts around the dividers and bottom panel. Of course before I did any of this I made sure to place some clear packing tape on all the mitered joints.


I glue the walnut splines in place, but before I do that I check the fit of each one. After the glue dries, I use a flush trim saw to cut off the waste. I then sand everything flush.


I also went ahead and installed the chain to keep the lid from flopping backward. Since the box will have an upper tray, I also attached some wooden risers on the interior of the box. Notice the rabbet cut on the riser on the chain side of the box? This rabbet will act as a stop, which will prevent the tray from sliding side to side and hitting the chain.


A closeup of the grooves I cut to house the bottom panel of the tray.
Please join me next time for part 10 when I will be constructing the dividers of the trays.
Thanks for looking!
Roshaan
 As soon as each corner is glued and any waste cleaned up, I can insert the top inlaid panel and the bottom panel in the grooves.
 The box snugly in clamps and just waiting for a cure :)
 At the bench using a sanding base to flatten the top edges of the box and lid.


