Gallery

19 June 2011

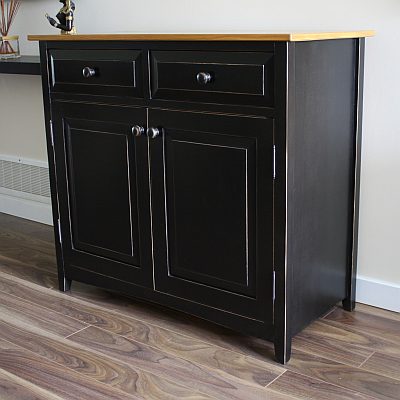
Chic country style cabinet

Hello,

I apologize for my gross neglect for the past few weeks! However, I am back now and I have a few photos to share with you of my newest project. The project is completed and hopefully happily sitting in my clients home. I do have reveal photos to share, but I would like to hear from you if you would like to see some in progress photos. So, if you do please let me know :)

So I present to you... the chic country style cabinet! Enjoy!

22 March 2011

Raven inlay Jewelry and Make-up Boxes-The Reveal

Hello,

Well, here it is! The finished inlay boxes. It was so much fun to construct. I'm hoping to do more marquetry in the near future.


The jewelry box.


The make up box.

Thanks for joining me!
Roshaan

20 March 2011

Raven inlay Jewelry and Make-up Boxes-Part Final

Hello,

Well, this is it! The final installment of the duo of boxes. In this part I will be applying a finish and putting on the final touches.


The finish I'm applying is a tough wearing tung oil. It also gives the walnut a warm finish and makes the grain really come alive.


After the finish has cured for a couple of days, it is now safe to handle without getting finger smudges on the fresh finish. I apply a rich brown felt to the bottom of the jewelry box and the upper tray. The make up box will simply have a nicely finished wooden interior. I also reattach all the brass hardware to finish everything off.

I really enjoyed this project and I hope you did too!

Please stay tuned for the reveal.

Thanks for looking!

12 March 2011

Raven inlay Jewelry and Make-up Boxes-Part 12

Hello,

In this part I will be installing the lock on the jewelry box. This takes precise measurements to ensure that everything lines up for the lock to function properly.


Before I tackle the lock however, I have to make sure that all the elements are in place, especially on the interior of the box. I make sure to glue the wooden risers in place first. Since it is awkward to use any kind of clamps to clamp the pieces in place, a very simple trick is to use thin strips of hardwood and flex it so that it wedges the parts and acts as a clamping mechanism.


After the glue dries I am now ready for the lock. This lock is known as a full mortise lock, since I have to cut a deep mortise for the locking mechanism to sit in. I made a simple drilling guide to help me locate the ends of the brass plate and the mechanism. The nice thing about this jig is that I can just line up the center line to the center of the base and the lid. This ensures that both brass plates line up perfectly.


Now it's just a matter of defining the edges of the shallow mortise with a marking gauge and using a palm router to clear away the bulk of the material. I use a chisel to clean up the rest.


After I cleaned up the shallow mortise for the brass plate I can now cut the deep mortise for the locking mechanism. I do this by drilling overlapping holes using the drill press. I then use a sharp chisel to square all sides of the mortise. This operation also applies to the lid, but the only difference is the depth of the mortise. The lid only requires a shallow mortise to ensure clearance for the arm of the lock.


Here I am installing both brass plates. Also notice that I have drilled and shaped the keyhole.
Please join me next time for the finale of the box duo project!
Thanks for looking!
Roshaan


Raven inlay Jewelry and Make-up Boxes-Part 11

Hello,

This part is the continuation of the upper tray construction. I will be focusing on the glue up of the trays and the reinforcement of the mitered joints with splines. So please join me!


Before I cut the half-lap joints in part 10, I first cut tiny tenons on the ends of the dividers. I then put each divider in place to determine the location of each half-lap joint. The tenons are easily done on the table saw with the miter gauge and stop block.


Before I do any glue up, I do a dry run first to prevent any headaches while I'm in the process of gluing the piece. Now is a good time to work out any kinks in your gluing operation. With this glue-up I determined that I first need to put the divider assemblies in one corner of the tray and then put the bottom panel in place at the same time. Then it's simply a matter of wrapping the other corner parts around the dividers and bottom panel. Of course before I did any of this I made sure to place some clear packing tape on all the mitered joints.


I use a band clamp to snugly bring everything together. This is a great clamp for a mitered box construction.


Here I am using my nifty (do people still say that?) table saw spline sled to cut the slots for the hardwood splines.


I glue the walnut splines in place, but before I do that I check the fit of each one. After the glue dries, I use a flush trim saw to cut off the waste. I then sand everything flush.


We are almost to the finish line! So please come back for the last few parts.

Thanks for looking!

Roshaan


Raven inlay Jewelry and Make-up Boxes-Part 10

Hello,

It's all about making the top trays in the next two parts. I will be cutting stopped grooves on my little Dremel router table and half-lap joints on the table saw. So, here we go!


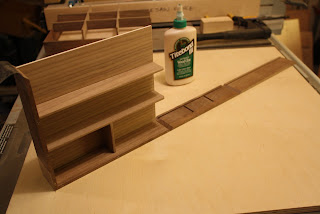
I love my Dremel tool! It is so versatile and can do pretty much everything bigger machinery can do, but on a much smaller scale. It is perfect for model makers, home owners and for woodworkers like me. Here I have attached my Dremel tool to a router table attachment to cut the 1/8" wide stopped grooves, which will join the cross members of the tray dividers.


Here are all the tray sides layed out to better visualize how the tray and dividers will come together. This tray is meant for the jewelry box and it will have 9 equal sections for rings and things.


Here I am cutting the half lap joints on all the dividers. It is best done on the table saw with a single saw blade instead of a stacked dado set. This method will yield greater accuracy when fitting parts together.


A half-lap is basically two notches going halfway through the corresponding parts and in opposite directions.


I glue up the dividers first before I glue them to the stopped grooves in the tray sides. Now is the perfect opportunity to clean up any glue squeeze-out.
That's it for now! Please come back soon for the continuation of the tray construction.
Thanks for looking!
Roshaan


Raven inlay Jewelry and Make-up Boxes-Part 9

Hi Everyone,


It's hardware time! This is a true sign that we are getting very close to the finish line. In this part I will be installing the hinges, the chains etc. and I will also start construction of the upper trays.


I usually cut the shallow mortises for the hinges using a hand held router and then square the lines with a sharp chisel. This time I'm trying something new. I'm using a router table with stop blocks on either side of the router bit, to control the length of the cut, which precisely fits the hinge leaves.


Notice that the router bit leaves a round corner? I simply use a chisel to square the corners to fit the hinge better.


I also went ahead and installed the chain to keep the lid from flopping backward. Since the box will have an upper tray, I also attached some wooden risers on the interior of the box. Notice the rabbet cut on the riser on the chain side of the box? This rabbet will act as a stop, which will prevent the tray from sliding side to side and hitting the chain.


The trays will have simple mitered corners with splines for reinforcement. At the table saw with the blade tilted at 45 degrees to cut the miters.


A closeup of the grooves I cut to house the bottom panel of the tray.

Please join me next time for part 10 when I will be constructing the dividers of the trays.

Thanks for looking!

Roshaan