This part is the continuation of the upper tray construction. I will be focusing on the glue up of the trays and the reinforcement of the mitered joints with splines. So please join me!

Before I cut the half-lap joints in part 10, I first cut tiny tenons on the ends of the dividers. I then put each divider in place to determine the location of each half-lap joint. The tenons are easily done on the table saw with the miter gauge and stop block.
Before I do any glue up, I do a dry run first to prevent any headaches while I'm in the process of gluing the piece. Now is a good time to work out any kinks in your gluing operation. With this glue-up I determined that I first need to put the divider assemblies in one corner of the tray and then put the bottom panel in place at the same time. Then it's simply a matter of wrapping the other corner parts around the dividers and bottom panel. Of course before I did any of this I made sure to place some clear packing tape on all the mitered joints.

I use a band clamp to snugly bring everything together. This is a great clamp for a mitered box construction.

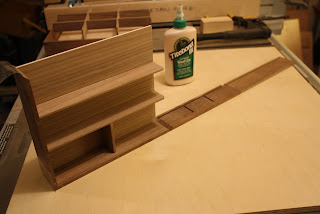
Here I am using my nifty (do people still say that?) table saw spline sled to cut the slots for the hardwood splines.

I glue the walnut splines in place, but before I do that I check the fit of each one. After the glue dries, I use a flush trim saw to cut off the waste. I then sand everything flush.
We are almost to the finish line! So please come back for the last few parts.
Thanks for looking!
Roshaan
No comments:
Post a Comment